Meshy: A Background that is Cool (MyABC)
My Experiments | | Links: CodePen Project
When creating this website, I wanted a cool cover to greet visitors. Here is what I came up with.
- Upgrades, Upgrades, Upgrades
- The Name’s Meshy
- Starting with Hot HTML and Calm CSS
- Now for the Fun Part
- Conclusion
Upgrades, Upgrades, Upgrades
I am a homebrewer myself, and through my days, I’ve had many a home server setups. I used to have an old Wordpress blog under the domain blog.hellodadiam.world. Don’t ask me why; I was in middle school.
Recently, I wanted to revamp all my old projects and microservices into something new and better. Like many starting out in home servers, my old station was a Dell Optiplex. Specifically, it was a i5-2500 Optiplex 990 from eBay that I acquired for less than $100. It served me well for many years as a tinkering machine to learn about the world of SysAdmin.
Now that I am migrating to a better, custom-built server setup that can handle more traffic and computing, it is time to formalize my presence on the web. I was lucky enough to buy this domain to put everything public under. But, as I was searching for hosting options for my permanent website, I was appalled by the monthly prices I needed to pay. Hell, I am an engineer; there must be a better way than this cash-grab of a market for those less technical.
Of course, I could’ve always hosted it on my server. However, I was tired of Wordpress and its lack of interesting themes or starting points. Besides, my server cannot guarantee a 99.99999999% uptime since, well, it’s at home. I wasn’t about to go all raw web application creating either; I can do some full stack dev, but I’m not a full-time web developer. (Oh, who am I kidding, I’m just lazy.) Ultimately, I settled for hosting a static website on Github Pages. I mean, I’m not trying to sell anything or give users an application. I just want a place to show my thoughts and projects.
I think it’s great to learn Jekyll or another static site builder. Unless you need the interactivity, static sites are customizable enough for many use cases. Besides, you can host them for free on Github Pages without needing to pay for a VPS solution (which is a win in this day and age). With all that being said, I still wanted something interesting to greet my visitors, something to stimulate their interest besides still colors and shapes.
The Name’s Meshy
I call it Meshy for absolutely no reason at all. I wanted an interesting title for this project, and transparent interactive triangle mesh background didn’t roll off the tongue (this isn’t a research paper, after all). Don’t mind the title, it’s more for me than you.
I won’t go into the process of me customizing my entire site, modifying my base theme, or making any other changes tailored to my preference. Everything shown here will work standalone, and it will be up to you to integrate it wherever you want.
You already know what it looks like since it’s on my website. For completeness, here’s the initial concept: I like those websites with elements that move with the mouse. Because I find the dense neural networks super cool (since I research them), I want to create a mesh that looks like a neural network and is attracted to the mouse. Below are some inspiration images that I started with:
A dense neural network structure presented as Figure 8.1 in Supervised Machine Learning For Text Analysis in R.
Photo by Resource Database on Unsplash.
Photo by John Cameron on Unsplash
Starting with Hot HTML and Calm CSS
The title says it all. The HTML is simply a canvas element, and the CSS helps make the canvas element fill the entire screen. The z-index ensures that it is always the background of any page. This will give us something to work with when we get into the fun part.
<canvas id="meshy"></canvas>
#meshy {
    position: fixed;
    top: 0;
    left: 0;
    width: 100%;
    height: 100%;
    z-index: -1;
    overflow: hidden;
    display: block;
    background-color: black;
}
Now for the Fun Part
Since we are building a static site, I cannot use any imports or modules to help me with my task; it will be completely native Javascript (my CS professors are rolling in their office hours right about now). That means I have to do math.
The Basics
We will first get the canvas and the context (2d in this case, unless you want to dive deep).
const canvas = document.getElementById("meshy");
const ctx = canvas.getContext("2d");

canvas.width = window.innerWidth;
canvas.height = window.innerHeight;
Making Triangles
We will need an array of vertices to create our triangles. I want these triangles to be randomized across the screen. They should also be moving, so we must give them some speed. Let’s define an initial move speed.
To make these shapes look more dynamic and “alive”, I will vary the opacity of each point, making sure that their opacity does not go below 50%. Let’s write this all out.
let points = [];
const MOVE_SPEED = 0.1;

function createPoints(count) {
    points = [];
    for (let i = 0; i < count; i++) {
        points.push({
            x: Math.random() * canvas.width,
            y: Math.random() * canvas.height,
            vx: (Math.random() - 0.5) * MOVE_SPEED,
            vy: (Math.random() - 0.5) * MOVE_SPEED,
            opacity: Math.random() * 0.5 + 0.5,
        });
    }
}
You will notice that I added a count argument. This is so that I can adjust the number of triangles on the screen dynamically, so we don’t have to set a magic number in the function. Let’s start with a reasonable 88 points for good luck and run the function.
const MAX_NUM_POINTS = 88;

createPoints(MAX_NUM_POINTS);
Finally, let’s turn them into triangles by adding edges to them. The math here is the same as you’ve learned in geometry class. For each pair of points, we’ll define an edge between them.
function createEdges() {
    edges = [];
    for (let i = 0; i < points.length; i++) {
        for (let j = i + 1; j < points.length; j++) {
            edges.push([points[i], points[j]]);
        }
    }
}

createEdges();

The screen we see up until now.
It’s black…well of course it is! We haven’t done anything with it yet! Let’s keep going.
Putting Them onto the Screen
Drawing them onto the screen isn’t too hard. We want to make sure that the canvas context is starting from a clean slate. We will also set the stroke color, fill color, and line width to be drawn.
const LINE_STROKE_COLOR = "rgba(255, 255, 255, 0.5)";
const LINE_STROKE_WIDTH = 0.8;
const POINT_FILL_COLOR = "rgba(255, 255, 255, ${p.opacity})";

function drawMesh() {
    ctx.clearRect(0, 0, canvas.width, canvas.height);

    ctx.strokeStyle = LINE_STROKE_COLOR;
    ctx.lineWidth = LINE_STROKE_WIDTH;

    // Draw all edges
    edges.forEach(([p1, p2]) => {
        ctx.beginPath();
        ctx.moveTo(p1.x, p1.y);
        ctx.lineTo(p2.x, p2.y);
        ctx.closePath();
        ctx.stroke();
    });

    // Draw points
    points.forEach(p => {
        ctx.beginPath();
        ctx.arc(p.x, p.y, 2, 0, Math.PI * 2);
        ctx.fillStyle = POINT_FILL_COLOR;
        ctx.fill();
    });
}

drawMesh();

The screen we see up until now.
Oh my lord, that’s a dense neural network alright. But while a true DNN is a black box, we don’t want this background to be one.
Less Dense than a DNN
The problem right now is that each point is being drawn to another point, even if they are across the screen. That makes the triangles overlap and cross over each other. We want to limit the distance the edges can travel between points. This requires updating the createEdges function to check for the distance between points. Since I haven’t used Latex in this post yet, here is the distance formula in case anyone has forgotten it.
$$ \begin{aligned} \sqrt{x^2 + y^2} \end{aligned} $$
We’ll find the distance between the two points and calculate its distance. If the distance exceeds some max, we will not add an edge. For my personal preference, I set this max distance to 150.
const MAX_EDGE_DISTANCE = 150;

function createEdges() {
    edges = [];
    for (let i = 0; i < points.length; i++) {
        for (let j = i + 1; j < points.length; j++) {
            const dx = points[i].x - points[j].x;
            const dy = points[i].y - points[j].y;
            const distance = Math.sqrt(dx * dx + dy * dy);

            if (distance < MAX_EDGE_DISTANCE) {
                edges.push([points[i], points[j]]);
            }
        }
    }
}
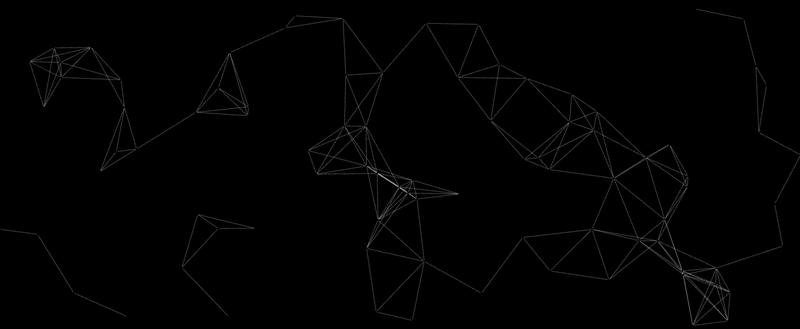
The screen we see up until now.
That looks much better. Every time the page reloads, there will be a random set of triangles. This seems much more manageable and less overwhelming.
Making Them Groove
Here is where those initial point velocities come in. Instead of having these points slow down or speed up, I want them to fade in and out. That way, we can reuse the opacity setting instead of calculating more speed.
To move the points, we update their position based on their velocities. If they hit the edge of the screen, we reverse their trajectory so they never leave the window.
Finally, we will fade their opacity over a predefined rate. Once they are gone, I want a new point to spawn. To save on memory and complexity, I can reuse the disappeared point’s object. I’ll recreate the point at a random place and set their random opacity again. The final function looks something like this:
const POINT_FADE_SPEED = 0.001;

function updatePoints() {
    points.forEach(p => {
        p.x += p.vx;
        p.y += p.vy;

        // Bounce off walls
        if \(p.x < 0 \|| p.x > canvas.width) p.vx \*= -1;
        if \(p.y < 0 \|| p.y > canvas.height) p.vy \*= -1;

        // Fade effect
        p.opacity -= POINT_FADE_SPEED;
        if (p.opacity <= 0) {
            p.x = Math.random() * canvas.width;
            p.y = Math.random() * canvas.height;
            p.opacity = Math.random() * 0.5 + 0.5;
        }
    });
}
We will wrap these functions into an animation loop to see how they look. Since we only want to create the points once, createPoints will not be a part of this loop.
function animate() {
    createEdges();
    drawMesh();
    updatePoints();
    requestAnimationFrame(animate);
}

animate();
The screen we see up until now.
We’re 90% of the way there! We have one more feature to add, but before that, let’s add a quick listener so that the animation will restart whenever the window size is changed. That way, the window will never crop or squish the animation.
window.addEventListener("resize", () => {
    canvas.width = window.innerWidth;
    canvas.height = window.innerHeight;
    createPoints(MAX_NUM_POINTS);
});
It’s Dynamic Time
What I want is for the mouse to influence the movement of the points. Specifically, when the mouse is near a cluster of points, it should be attracted to it. We first start by getting the position of the mouse on the screen. We will also add a check to set the position back to null if the mouse ever leaves the screen.
let mouse = { x: null, y: null };
canvas.addEventListener("mousemove", (event) => {
    mouse.x = event.clientX;
    mouse.y = event.clientY;
});

canvas.addEventListener("mouseleave", () => {
    mouse.x = null;
    mouse.y = null;
});
For each point, we want to find the relative path to the mouse. We will use our handy dandy distance formula again to calculate a radius around the mouse for its influence on the points. When it is in this radius, we want to gradually pull the points toward the mouse every frame. If the point is outside of this radius, then we want to slow the point back down to its original move speed.
const MOUSE_INFLUENCE_RADIUS = 100;


function applyMouseInfluence() {
    points.forEach(p => {
        let dx = mouse.x - p.x;
        let dy = mouse.y - p.y;
        let distance = Math.sqrt(dx * dx + dy * dy);

        if (distance < MOUSE_INFLUENCE_RADIUS) {
            p.vx += dx * 0.001;
            p.vy += dy * 0.001;
        } else {
            if (Math.abs(p.vx) > POINT_MOVE_SPEED) {
                p.vx *= 0.999;
            } else {
                p.vx = (p.vx < 0 ? -POINT_MOVE_SPEED : POINT_MOVE_SPEED);
            }

            if (Math.abs(p.vy) > POINT_MOVE_SPEED) {
                p.vy *= 0.999;
            } else {
                p.vy = (p.vy < 0 ? -POINT_MOVE_SPEED : POINT_MOVE_SPEED);
            }
        }
    });
}
One major problem I see right now is that if the mouse stays still in one place, the points will bounce back and forth around the mouse forever. This is annoying. We will add a movement threshold so that if the mouse stops moving for a while, we will have its influence stop. We define the last mouse movement time and update it whenever it moves. The updated functions look something like this.
const MOUSE_IDLE_THRESHOLD = 1000;

let mouseMoveTime = Date.now();
canvas.addEventListener("mousemove", (event) => {
    ...
    lastMoveTime = Date.now();
});

let timeSinceLastMove = Date.now() - mouseMoveTime;
function applyMouseInfluence() {
    timeSinceLastMove = Date.now() - mouseMoveTime;

    points.forEach(p => {
        let dx = mouse.x - p.x;
        let dy = mouse.y - p.y;
        let distance = Math.sqrt(dx * dx + dy * dy);

        if (distance < MOUSE_INFLUENCE_RADIUS) {
            p.vx += dx * 0.001;
            p.vy += dy * 0.001;
        } else {
            if (Math.abs(p.vx) > POINT_MOVE_SPEED) {
                p.vx *= 0.999;
            } else {
                p.vx = (p.vx < 0 ? -POINT_MOVE_SPEED : POINT_MOVE_SPEED);
            }

            if (Math.abs(p.vy) > POINT_MOVE_SPEED) {
                p.vy *= 0.999;
            } else {
                p.vy = (p.vy < 0 ? -POINT_MOVE_SPEED : POINT_MOVE_SPEED);
            }
        }

        if (timeSinceLastMove > MOUSE_IDLE_THRESHOLD) {
            if (Math.abs(p.vx) > POINT_MOVE_SPEED) {
                p.vx *= 0.995;
            } else {
                p.vx = (p.vx < 0 ? -POINT_MOVE_SPEED : POINT_MOVE_SPEED);
            }

            if (Math.abs(p.vy) > POINT_MOVE_SPEED) {
                p.vy *= 0.995;
            } else {
                p.vy = (p.vy < 0 ? -POINT_MOVE_SPEED : POINT_MOVE_SPEED);
            }
        }
    });
}
Last but not least, we will add this mouse influence into our animation sequence.
function animate() {
    createEdges();
    applyMouseInfluence();
    drawMesh();
    updatePoints();
    requestAnimationFrame(animate);
}
Conclusion
The final product!
And that’s it! Implemented purely in Javascript and transparent, you can add it to any website. Add it on top of content for those with short attention spans too, if need be! My website has tailored some of those magic number values, but those are customizable options left up to you. You can find the complete code at the CodePen link above.
Hope you had fun with this one!